By Lorraine Spaulding
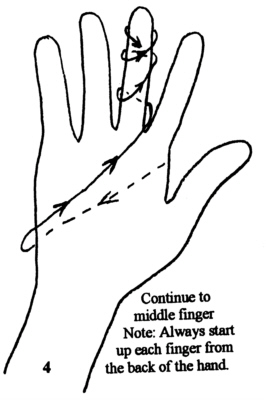
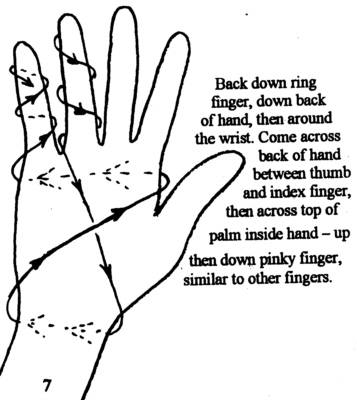
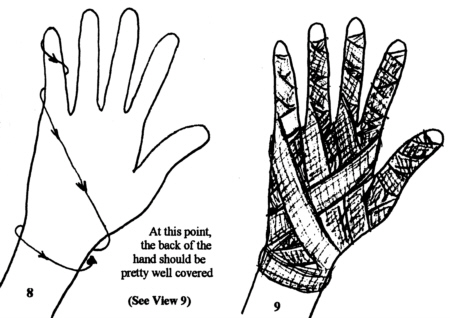
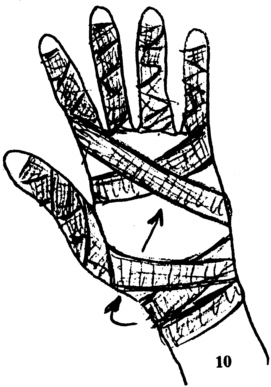
The following illustrations are an example of a hand wrapping technique found to be helpful in the protection and preservation of RDEB involved hands. The instructions are for very small hands and some adjustments probably need to be made for larger hands. Lorraine also have some suggestions if anyone is having trouble with the thumb pulling in.
Please note: these instructions may seem overwhelming at first, but after a little practice and as your child gets used to the process, it becomes a worthwhile routine.
Keep in mind the positive results and don’t get discouraged!
Note from the webmaster: this is a graphic intense page. I recommend waiting for it to load and then print it out.
WATCH THE VIDEO OF THIS DEMONSTRATION AT THE STANFORD WEBSITE:
http://dermatology.stanford.edu/gsdc/eb_clinic/eb-videos.html
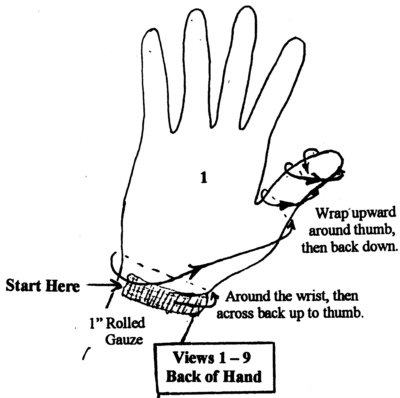
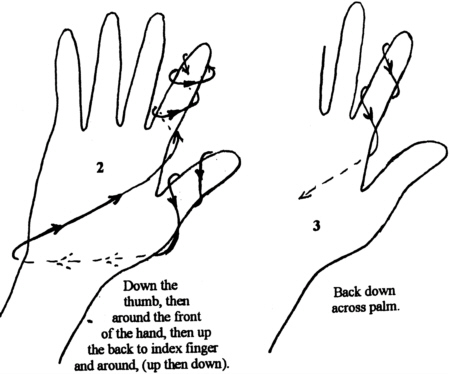
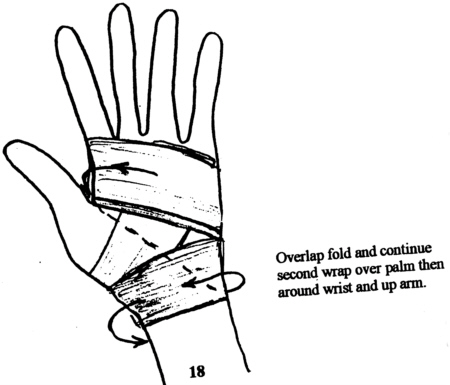
All illustrations are of the left hand.
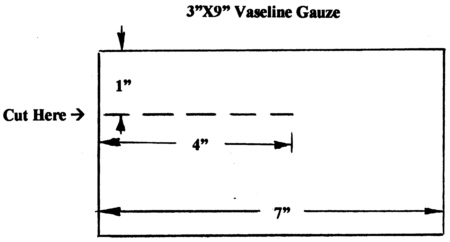
Step 1 is an optional application of Vaseline Gauze to the palm of the hand. Use a 3″ X 9″ piece of Vaseline Gauze. Cut about 2″ off one end, then slit lengthwise about a 4″ length, about 1″ down from the top edge.
Wrap around hand with 1″ strip between thumb and index finger.
This provides some resistance from retracting.
Fingertips can be left exposed to some degree, so that tactile sensation can be experienced.
At this point it may be necessary to start a 2nd roll of 1″ gauze. Make one overlap and continue.
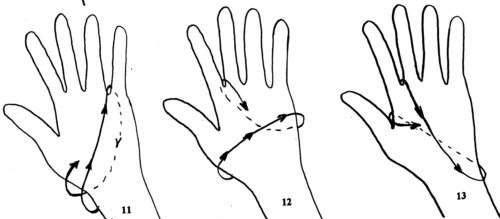
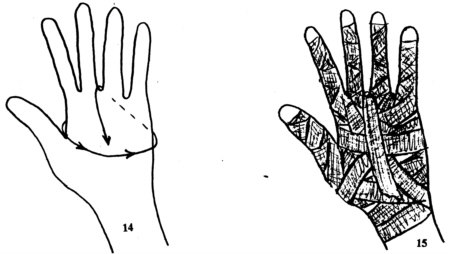
Views 10-19 Front of Hand
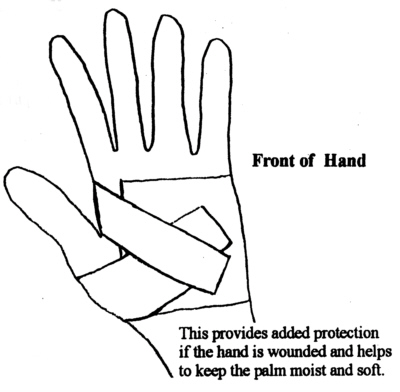
Spaces in palm bandaging will be covered by criss/cross bandaging of web spaces.
Web spacing can be randomly done. The point is to cover any open areas of the palm while
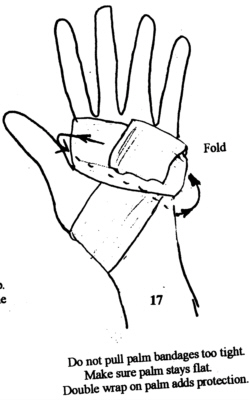
gently pulling a wrap between each web space
Be very careful to never wrap or pull too tight!
Be sure to have slight tension in web spaces.
Suggest wrapping additional 1/2 roll of bulky bandage around arm from the wrist to the upper arm. (Held by Tube Gauze) Provides padding of forearm and elbow.