By Sheri Coil – with the assistance of Brandi & Alex
The arms are all wrapped and the under-prep is done; the creams, ointments, lotions and potions are on, the non stick dressings are applied… and we are ready to start the torso.
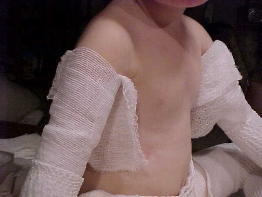
Picture of just arms done, bare torso
We start with a 4″ Kendall Conform roller bandage (can be 3″ for newborn) and take one lap around the body. The bandage will then cross over the back and pass over the shoulder,

Pic of Brandi going over shoulder
around it to go to the back again under the armpit.
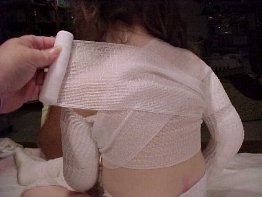
Pic of Brandi making cross X in back
Actually – it does not matter whether it starts to cross on front or back, the pattern is the same.
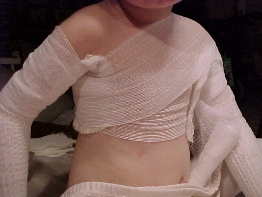
Picture of starting in front
It will then pass over the opposite shoulder, around it and back thru to back under armpit. It will keep going around the shoulder to the front.
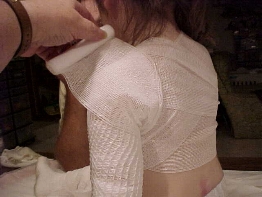
Picture of it going over the shoulder to front
Now the same basic pattern will be used to make a cross X in the front; across the chest to armpit
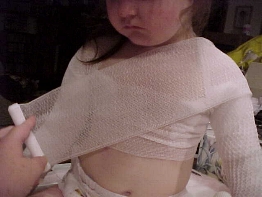
Pic crossing chest to ap
around the shoulder and across the chest to complete the X. Finish wrapping the torso.
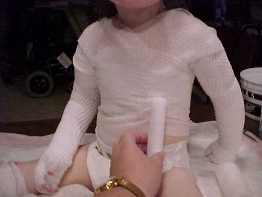
Pic of torso wrapped
This is the base wrap. From here are options. For light wrap, we go around the torso with 4″ J&J Sof-Kling to give more strength to body wrap. Add your padding where ever you need it for protection and absorbancy.

Picture of Alex back with padding
Finish with stretch gauze, which we will talk about later.
The heavy duty, protect the armpits from most assault method is what we use the most now. After the Conform layer, we use a layer of Kerlix.
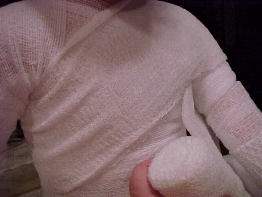
Pic of kerlix around body
Go around the body, over a shoulder
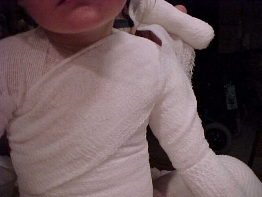
Pic going over the shoulder
and around the upper arm.
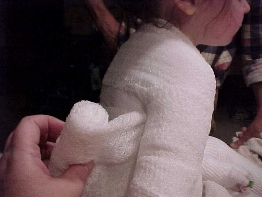
Pic around arm
Cross over the body and around the other shoulder and upper arm. This pattern of crossing over and around should be used until we have done as much as can be covered. We wrap one layer around the rest of the body to the waist. We also put a layer of Sof-Kling over the top of this for more strength. Remember, our kids are very active and we want them really protected.
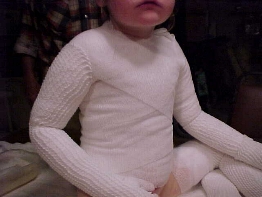
Pic all done
Stretch Gauze:
Method 1: this is a single tube sleeveless shirt. Take a piece of tube that is the length you need. Our kids use one about 15 inches long. About 3 or 4 inches down, make a snip into each side.
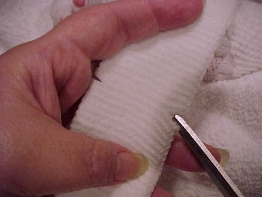
Pic of snipping
put one arm through one of the snipped holes.
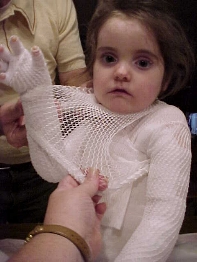
Pic putting it on
Pass over the head, putting it into the tube end hole and the other arm through the other snipped hole.

Pic of done
Method 2: This idea came from Lorraine, Garrett’s mom. It is the super dooper keep those armpits under control method. I love it and have adopted it. It also keeps the stretch tube gauze away form the neck when you need it away, because it makes a v-neck tee shirt. Take two pieces of the torso tube gauze and about 5 or 6 inched down one side make a snip.
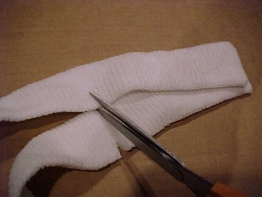
Pic of snip
Take the first and gather it all up with the short side of the cut towards you.
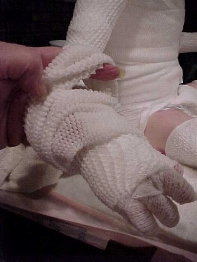
Pic of putting it on
Slip it over the arm putting head

Pic of slipping over head
and the opposite arm through the hole
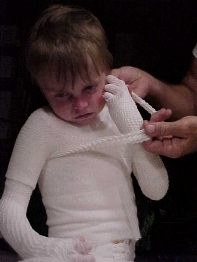
Pic of putting over arm
and pull it down the body. Do the same on the other side.
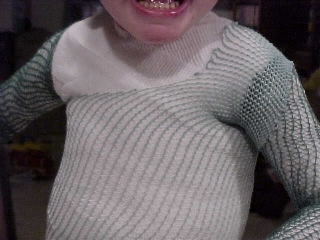
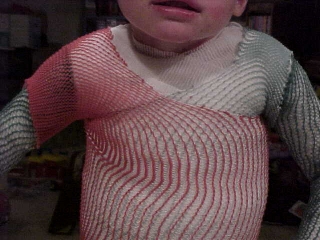
Pic of one side done (with colored gauze so it is more easily seen) and finished
Method 3: This is for those times when you need to really keep dressings on the neck. Using method one, make your side cuts much further down. When you put it on, it will form a turtleneck.
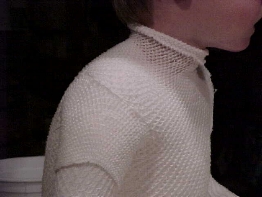
Pic of turtleneck
Thank you Cristina.
Method 4: I devised this method because, while the way the armpits in method 2 were protected was great, it leaves a deep vee in the center chest and back where the bandages were not protected and kept under control. Take a piece of tube gauze, about body size and about 15 inches long. On one side cut a 2-3″ slit.
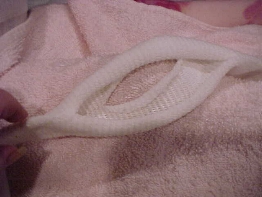
Pic of snips on stretch gauze
On the other, cut a 4″ or so slit. With the short slit up, pull the tube gauze over the head, with the head going through both cut holes. Put an arm thru the long slit.

Pic of putting it on
Then into the “sleeve”. Put the other arm into bottom hole and out the other “sleeve”. Now you have a crop top with sleeves.
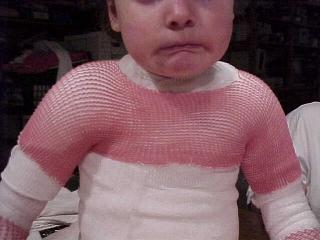
Pic of arms done
If you finish this with a method #1 sleeveless top it will cover everything well.
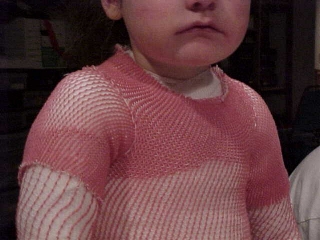
Pic all done
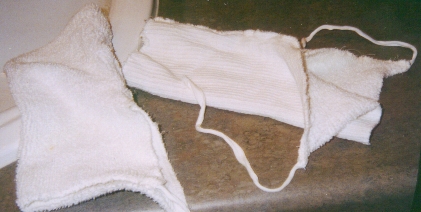
Here’s some pics of Armpit bandages made of soft cloth:
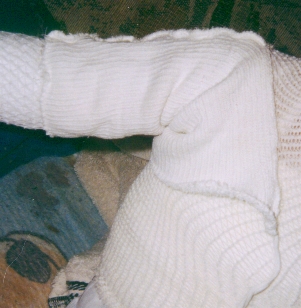
and what they look when they are on:
They slide on like this (top) and tie up like this… (bottom)


